
简单介绍
游戏按键如下图

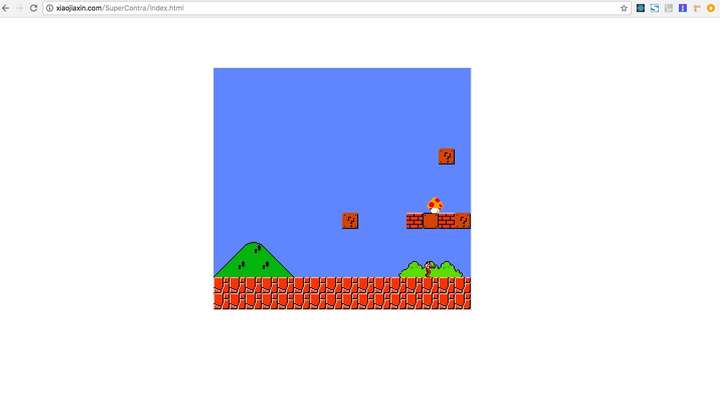
顶这个墙出现蘑菇, 此蘑菇接了才可以发子弹
React 写游戏的一些心得

1. React的优势
- 数据驱动, 根据state或者props的变化 => 视图的变化, 以前的方式往往是直接操作 DOM 实现, 触发某事件使得元素移动代码类似如:
    moveRight() {
        this.left += 8;
        this.draw();
    }

    draw() {
        if(this.ele === null){
            this.ele = document.createElement('img');
            this.ele.src = this.url;
            this.ele.style.width = this.width + 'px';
            this.ele.style.height = this.height + 'px';
            this.ele.style.position = 'absolute';
            app.appendChild(this.ele);
        }
        this.ele.style.left = this.left + 'px';
        this.ele.style.top = this.top + 'px';
    };
现在就友好很多
    moveRight() {
        this.setState( preState => (
            {
                left: preState.left + 8
            }
        ));
    }

    <ContraBG
        left={left}
        top={top}
        status={status}
        toward={toward}>
    </ContraBG>
- 结构更清晰, 逐个书写需要渲染的组件, 能让人一目了然的知道游戏运行中加载的组件, 老的方式代码风格去渲染一个元素如
    const contra = new Contra();
    const bulletsMap = new BulletsMap();
    const enemiesMap = new EnemiesMap();
    contra.draw();
    bulletsMap.draw();
    enemiesMap.draw();
如果渲染的多了结构复杂了,阅读就会十分困难。现在的代码风格就能够一目了然的看到所有运行的组件
=>
    @observer
    class InGame extends React.PureComponent<InGameProps, {}> {
        render() {
            const { store } = this.props;

            return (
                <InGameBG   // 包裹组件负责渲染背景变化相关
                        store={store}>
                        <Contra // 玩家控制的角色组件
                            store={store}/>
                        <BulletsMap // 负责渲染子弹
                            store={store}/>
                        <EnemiesMap // 负责渲染敌方角色
                            store={store}/>
                </InGameBG>
            );
        }
    }
2. React的劣势
前者类与类之间继承会灵活很多, 如
飞机继承至飞行物 => 飞行物继承至动态物 => 动态物继承至某一特性物体
React 不推崇继承, 可采用组合, HOC高阶组件思想去渲染一系列具有相似性质的组件。如超级玛丽游戏中有许多的墙,它们具有相似的渲染逻辑,以及一些都会需要用到的方法, 可以通过写一个静态方块的高阶组件去生成, 能够更高效的管理代码。
    function WithStaticSquare<TOwnProps>(options: StaticSquareOption):ComponentDecorator<TOwnProps> {
        return Component =>
            class HocSquare extends React.Component<TOwnProps, HocSquareState> {
                // xxx
                render() {
                    const { styles, className } = this.state;
                    const passThroughProps: any = this.props;
                    const classNames = className ? `staticHocWrap ${className}` : "staticHocWrap";


                    const staticProps: WrappedStaticSquareUtils = {
                        changeBackground: this.changeBackground,
                        toTopAnimate: this.toTopAnimate
                    };  // 提供一些可能会用到的改变背景图的方法以及被撞时调用向上动画的方法

                    return (
                        <div
                            className={classNames}
                            style={styles}>
                            <Component
                                hoc={staticProps}
                                {...passThroughProps}/>
                        </div>
                    );
                }
            }
    }
3. 性能问题
- 避免卡顿 前者直接操作某个DOM渲染不会有太多卡顿现象发生
React使用Mobx, Redux等进行整个游戏数据控制时, 如果不对渲染进行优化, 当store某个属性值变化导致所有接入props的组件都重新渲染一次代价是巨大的!
- 采用 PureComponent 或者为 Component 加入 shouldComponentUpdate
    class Square extends React.PureComponent<SquareProps, {}> {
        // xxx
    }
其中就需要了解PureComponent。React.PureComponent是2016.06.29 React 15.3中发布。
PureComponent改变了生命周期方法shouldComponentUpdate,并且它会自动检查组件是否需要重新渲染。这时,只有PureComponent检测到state或者props发生变化时,PureComponent才会调用render方法,但是这种检查只是浅计较这就意味着嵌套对象和数组是不会被比较的更多信息
- 多采用组件去渲染, 对比两种方法
    // 方法1.
    <InGameBG   // 包裹组件负责渲染背景变化相关
            store={store}>
            <Contra // 玩家控制的角色组件
                store={store}/>
            <BulletsMap // 负责渲染子弹
                store={store}/>
            <EnemiesMap // 负责渲染敌方角色
                store={store}/>
    </InGameBG>
    //方法2.
    <InGameBG
        store={store}>
            <Contra
                store={store}/>
            <div>
                {
                    bulletMap.map((bullet, index) => {
                    if ( bullet ) {
                        return (
                            <Bullet
                                key={`Bullet-${index}`}
                                {...bullet}
                                index={index}
                                store={store}/>
                        );
                    }
                    return null;
                })
                }
            </div>
            <EnemiesMap
                store={store}/>
    </InGameBG>
这两种方法的区别就是在于渲染子弹是否通过组件渲染还是在父组件中直接渲染, 其中方法2的性能会有很大的问题, 当某个子弹变化时使得最大的容器重新渲染, 其中所有子组件也会去判断是否需要重新渲染,使得界面会出现卡顿。而方法1则只会在发生数据变化的子弹去渲染。
- getLazyLoadMap 对地图的实时切割渲染(非常重要!!!)
const LIMIT: number = 16;
const GAME_WIDTH: number = 512;

@observer
class SquaresMap extends React.PureComponent<SquaresMapProps, {}> {
    getLazyLoadMap() {
        const { staticSquareMap, inGameGBLeft } = this.props.store;
        const OFFSET = Math.abs(inGameGBLeft) / GAME_WIDTH * LIMIT;
        return staticSquareMap.reduce((preVal, currentVal) => {
            const items = [...currentVal];
            const current = items.splice(OFFSET, LIMIT);
            preVal.push(current);
            return preVal;
        }, [] as StaticSquareManagementType[][]);
    }
4. 需要注意的点
- 及时移除监听, 在组件卸载时需要移除该组件的事件监听, 时间函数等。如游戏开始组件
    class GameStart extends React.Component<GameStartProps, {}> {
        constructor(props) {
            super(props);

            this.onkeydownHandle = this.onkeydownHandle.bind(this);
        }
        componentDidMount() {
            this.onkeydown();
        }
        componentWillUnmount() {
            this.destroy();
        }
        destroy(): void {
            console.log("游戏开始! GameStart Component destroy ....");
            window.removeEventListener("keydown", this.onkeydownHandle);
        }
        onkeydownHandle(e: KeyboardEvent): void {
            const keyCode: KeyCodeType = e.keyCode;
            const {  store } = this.props;
            const { updateGameStatus } = store;
            switch ( keyCode ) {
                case 72:
                    updateGameStatus(1);
                    break;
            }
        }
        onkeydown(): void {
            window.addEventListener("keydown", this.onkeydownHandle);
        }
        render() {
            return (
                <div className="gameStartWrap">
                </div>
            );
        }
    }